To my overview page
This page will contain stuff about repair of old
computers (presently only the first but hopefully I will get around to
write more on this subject).
Keyboard keyswitch cleaning
Bad keys are such an annoyance, and replacement keyswitches are hard to come
by nowadays. So I clean them, inside.
Lots of work but, wow it's a great
success.
| 1 Open the machine and unscrew the screws holding the keyboard.
|
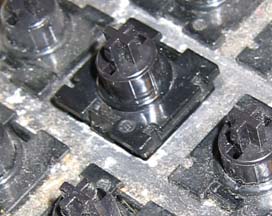
| 2 Take away the caps from the key and several of those around it,
carefully prying them straight up.
|
| 3 Desolder the switch so that the leads move freely in the holes (sideways).
|
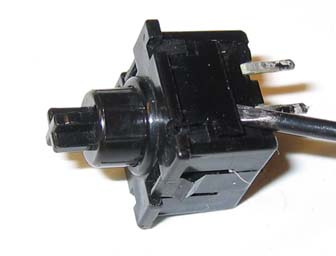
 4 It is now only the catches that hold it in the metal frame and they
can be carefully bent inwards so that they release and the switch so
that it comes out upwards. 4 It is now only the catches that hold it in the metal frame and they
can be carefully bent inwards so that they release and the switch so
that it comes out upwards.
Photo from my model 4, desoldered and with catches loosened.
|
 5 Having it out, release the 4 catches around and take the switch
apart (carefully, observing how the pieces should go together again) 5 Having it out, release the 4 catches around and take the switch
apart (carefully, observing how the pieces should go together again)
|
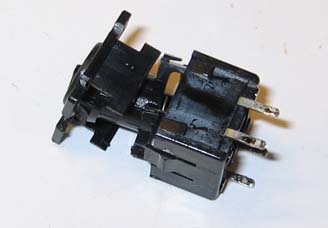
 Photos prying open the catches and half apart Photos prying open the catches and half apart |
6 With the thing apart I clean the metal pieces, the actually switching
parts, with contact cleaner spray and q-tip. If there is a membrane cup
thing I'd clean that too but more carefully and not pressing hard.
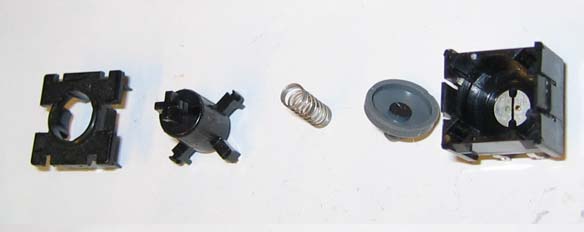
 Photo of the parts. I would clean the bottom two parts (to the right in the picture) with contact
cleaner and rubbing with a q-tip, do the membrane thing very light and carefully,
and the metal plates in the bottom with some force.
|
| 7 Reassemble and use a multimeter to see that the switch is ok before
putting it in place and solder it again. (It is too much work if you have to get it out again).
|
The photos are of the keys in the TRS-80 Model 4. I have also done
my Model III. It has different keyswitches, with a metal tongue instead
of the membrane thing.
Disclaimer This is not easy, don't do it unless you are confident that you can succeed.
Some skill with small things and soldering is needed, and to remembering how to put together again.
If you do any of this you do it at your own risk.
©2005 Knut Roll-Lund
To my overview page
 4 It is now only the catches that hold it in the metal frame and they
can be carefully bent inwards so that they release and the switch so
that it comes out upwards.
 5 Having it out, release the 4 catches around and take the switch
apart (carefully, observing how the pieces should go together again)
 Photos prying open the catches and half apart
 Photo of the parts. I would clean the bottom two parts (to the right in the picture) with contact
cleaner and rubbing with a q-tip, do the membrane thing very light and carefully,
and the metal plates in the bottom with some force.